


Troubleshooting
Running into an issue with your EFI system? Check out our checklist and troubleshooting guide below!
If you still run into issues, you can contact us by using one of the channels on our main Support Page here.
General Checklist
Use this list to verify the correct setup of your system before you drive it for the first time.
The Startup Wizard must be completed for the system to properly calibrate and function. Skipping this step can result in poor performance or failure to start. Your handheld or Bluetooth app should prompt you to complete the startup wizard the first time you power the system on, but you can also re-access it at any point by clicking settings >
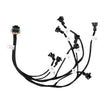
The system’s main power and ground must be connected directly to the battery terminals. Do not connect them to the starter, alternator, distribution block, or solenoid, as this can cause ECU failure.
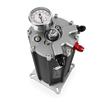
Our EFI systems are designed to operate at 43-58 PSI of fuel pressure. The fuel pump must be rated for at least 255 liters per hour (LPH) to ensure proper performance. Check your fuel pressure gauge to ensure it reads the proper fuel pump pressure.
Some new features can be unlocked and bugs patched by updating your system's firmware to the latest version. You can read how to do so by visiting our firmware page here.
The O2 sensor must be installed in the exhaust pipe, not in the header. It should be positioned 6 to 10 inches downstream from the point where the manifold or header connects to the exhaust system.
The system must have at least 11 volts during cranking to ensure proper operation of the coil driver and injectors.
If the voltage drops below this or the display shuts off while cranking, relocate the ignition power wire to a more stable source or install a secondary relay to maintain consistent voltage.
The VMain wire is a voltage output and should only be used when running a hall effect distributor, such as the Aces Gambler Series distributor, or when needing to trigger an auxiliary relay for another subsystem. It is not required or intended for use with other ignition setups.
For classic engines using a distributor:
If you are trying to run timing control by letting the ECU control your timing, your distributor's mechanical advance must be disabled, base timing should be set to 15° BTDC, and the handheld must be set to allow the ECU to control the timing.
The MAP sensor port plug should only be installed for draw-through Roots-style supercharger setups. You must use a separate vacuum hose to reference boost to the MAP sensor.
Biggggggg no no. If the harness or system has been modified, it may cause the system to malfunction and can void the warranty.
General Troubleshooting
Check out some of the most common issues and solutions below.
Symptom (s)
- No data is displayed
- "Connect Timeout" message shows
Possible Causes
- CAN H/L pins are swapped
- Handheld power/ground loose
- Handheld firmware mismatch
- Wrong system selected
- ECU not powered properly
- Damaged CAN chip (internal HH/ECU)
Solution Steps
- Verify CAN pinout — H/L correct
- Test handheld power/ground
- Confirm firmware versions
- Cycle ECU power
If your handheld behaves erratically, shows lines across the screen, or powers off/on at random, then this is typically a voltage-related issue. Please check that your power and grounds are all run directly to the battery, and make sure that the VMain wire is not being used except as a power output for hall effect distributors.
Killshot Series
Killshot Series: Common Issues & Solutions
Killshot issue? This guide lists the most common symptoms and the fastest fixes. Follow the short checklists, verify wiring and settings How to use this page Start with the symptom that best m...